Hatching Baby Chicks

There are two ways to hatch baby chicks; a small incubator and with good setting hens.

Hatching with a setting hen, requires waiting for a hen to go broody which somes breeds are more naturally prone to than others. But even then Spring and Summer are the most likely times of the year. For early chicks or for when an accomodating hen is not forthcoming, an incubator must be bought. Incubators can be as trustworthy as hens but will vary so you must always follow the manufacturers instructions and it is probably a good idea to get everything running and settled down for at least 24 hours before adding any hatching eggs.

The incubator is very little trouble and the care of the brooder is very little more trouble than the care of hens and if one has a good-sized flock of young chicks, or you would like your chickens to be more tame by handling them regularly then brooding them yourself might be preferred.

hen with chick in nest box

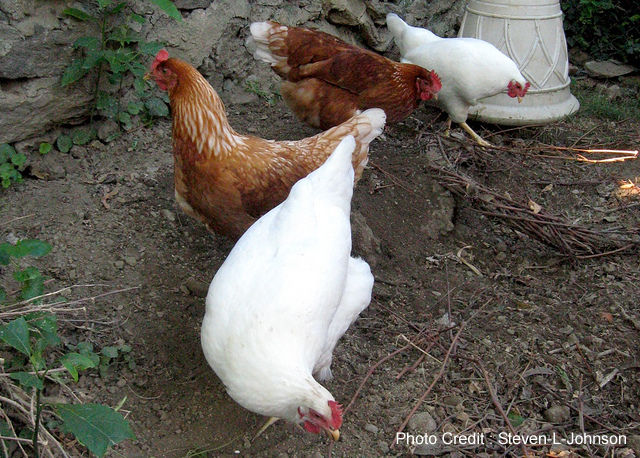
It is different with hens. Hens are like some women, they are very emotional and they can be as moody as a sixteen-year-old girl, that is some hens, yet one can come across “biddies” that are as steady as a rock.

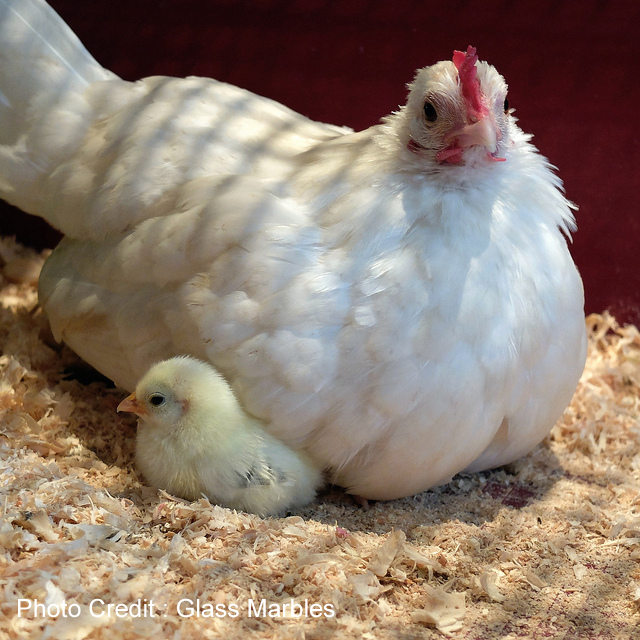
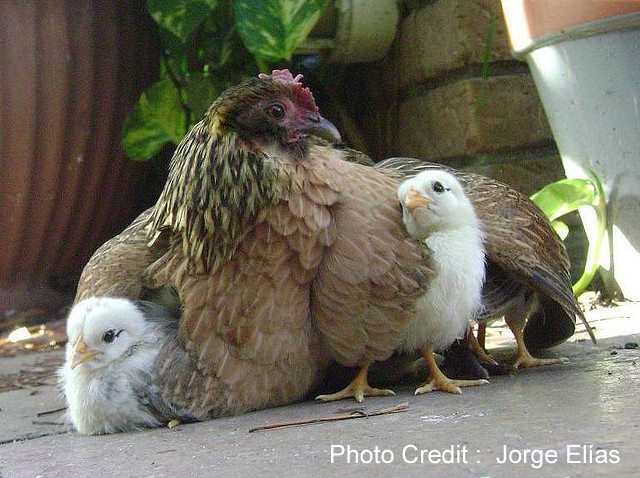
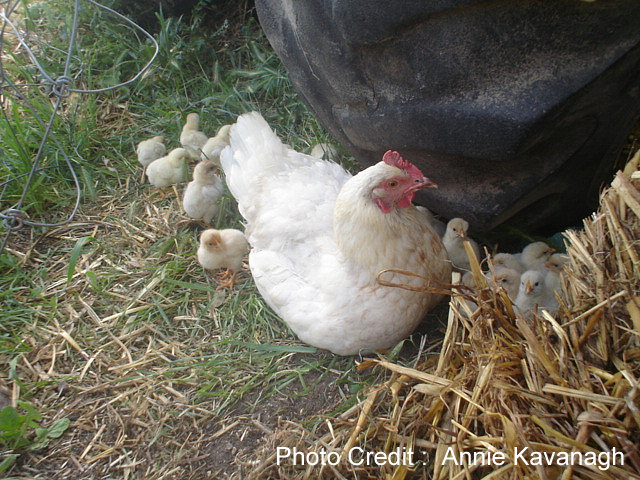
Choose carefully when picking out a sitter. A hen that will fly from the nest when approached is the hen that is not to be trusted. The hen that will allow you to handle her without being flustered is likely to be the “biddy” that will break few eggs and the one that will hatch the greater number of chicks.

In preparing for your baby chicks, it is well to be sure of the fertility of your eggs. If you will try and get one egg from each hen in your yard, set these eggs under a good mother hen, test out on the fifth day, you will be apt to learn just what hens are throwing the infertile eggs.

The old way of trapnesting hens is a sure way to discover the hen that is laying the infertile egg but if you are a close observer, watch the hens for a few days, you can soon know the eggs from the different hens, that is provided your flock consists of not more than a dozen hens. I have found several tell-tale signs with my own hens, even those of the same breed, for instance one of mine lays an egg that is rounder than the others, anothers tend to have speckles, and several of the girls have different shades (one is particularly pale which make it very easy to keep tabs on her). Not to mention I quite often see who has gone into the nestboxes which does tend to make things a little easier 🙂

Getting some sun

I found details of how one old time poultry keeper made broody nests for eight sitting hens at once. These nests are made as follows;

I make a lean-to shed two feet high at front and fourteen inches at the back. The shed is divided into eighteen-inch wide compartments, the shed being two feet wide. For the roof I use three twelve-inch planks patterned together. At the front or highest end, I hinge the roof to the coop so that it can be opened from the back or low side. This nest affair has no bottom but the nests are made in the ground, a hole scooped out and the nest well filled with straw. One should build his setting coop on a high piece of ground so as to avoid dampness.

In the front of my nest house I build runs, fourteen inches high, eighteen inches wide and four feet long. Over this I have a frame of wire netting, the frame so fixed that it can be raised. In these runs I have the water and feed for the hens and there is no chance for any of them to disturb the other.

I try and set eight hens when I have them and if my neighbors have good setters I purchase them. In this eight-compartment house I have hatched the most of my chicks for the last two years. I have a good incubator but as I am away from home the greater portion of my time, I had to quit hatching with an incubator. There is only one objection to an incubator and that is it is like a milk cow, it must be attended to night and morning. With setting hens fixed as described above, one can put in enough feed and water for several days and leave them to their own care.

I forgot to mention that I have little doors on leather hinges that I drop in front of each compartment and I generally keep them shut for the first two days, or until the hen shows that she is satisfied with her nest and means business. I find some hens flighty even after moving them to these nests and it is a good idea to put them on the nest with one egg and if they are setting well the next day, give them the whole setting. If the hen proves restless for two or three days, one is ahead to throw them into the break-up-broody coops and get another hen to take their place.

I always test the eggs on the fifth day, one can do it on the fourth day but the germ shows up better on the fifth day and it is easier for the amateur to distinguish the life germ. I find that one can get a good tester from the incubator companies. One that can be placed on a lamp is the most simple. If one buys a tester they can generally get directions how to use it.

A simple tester is made by taking a box, one about the size of an apple box, saw a hole in the side of the box about the height of the flame of a lamp. Place your lamp so that the flame comes to the hole, cover the open side with a cloth and bore a small hole in the top or end of the box, so the fume can get out of the box. Take your eggs and hold them to the hole in the box where the flame comes and if the egg be fertile you can see the life germ. This germ looks like a red spider and if it is a good healthy germ it will spread out so it can be easily distinguished.

When your hens begin to hatch, do not disturb them. Shut the hinged door in front of the nest. This makes things dark and the hen is more apt to stick to her nest until every egg is hatched.

chicks exploring their new world

Tips for ending up with a hen house you love

As far as backyard projects go building a place for your chickens to live in has to be up there as one of the most important. Your flock won’t have many demands in terms of beauty (although you might) but they do need it to be big enough, secure and habitable (dry, damp free and with ample ventilation).

Their space requirements inside the coop are between 2 and 4 square feet each minimum – depending on the breed and size of your chicken. If they are going to be living inside a lot of the time then erring on the higher side of things would probably be best as cramped ‘cooped up’ chickens will turn on each other. If they will be out and about in a secure pen or free ranging for most of their day then the space inside will not be as important as they will only be using it to roost and to lay eggs.

backyard-hens

Before you even get your chicks it is probably wise to check that you will be allowed to keep them; some areas don’t allow chickens, others do, but only pullets and hens (a rooster may be persona no grata) and others may allow them but only a certain number etc. etc. Also, there may be rules about where to place the building and its size. A large (or even small) coop appearing in your garden may be upsetting to your neighbours and if you have inadvertedly broken any of your local rules and regulations you will be leaving yourself open to someone making a complaint and you being forced to tear it down again.

1. You begin by choosing where to build:

This first phase is the most vital one. Here you ensure that the site is dry, can be accessed with ease, and relatively level. If the area that surrounds your coop is prone to collecting water it will make things that much harder to keep sanitary and you don’t really want your chickens to have to wade through muddy puddles every day. It also will lessen the life of a wooden chicken house and be a bit depressing to go out to when you need to do your daily chores (feeding, removing droppings from under the roost, little tidy up etc.)

2. Create good rapport with your neighbours:

Often neighbours are wonderful and will really enjoy seeing your little flock peck around and be happy to receive any extra eggs you may have going spare 🙂 but sometimes you will find one who resents the chickens, complains they are noisy (especially if a rooster is waking them up at 4am) and sets about causing problems for you with the council / local authority. It is a shame some people can be so anti-chickens (even when their dog is barking its head off all through the day, but they don’t care about that do they?) if you have ‘bent’ or ignored any rules governing if and how you can keep chickens unfortunately you will be quite susceptible to their threats.

3. The need for Sound foundation creation:

With small coops this doesn’t matter so much but if you are building something sizeable it is wise to make sure you have a proper foundation for it and do regular checks that things are being built square (otherwise you may end up with a slightly wonky coop with a door that never shuts properly and a roof that has a gap that you never intended – although may be useful as additional ventilation provided it is not allowing any water or drafts in).

I’m not totally up on all the building lingo and have never taken on such a big project but I have read that the key to a solid foundation that will last is proper materials, so it’s vital to support small-medium-size coops with a foundation that is on-grade prepared by pressure-treated timber (i.e. skids) or solid-concrete blocks which will be in direct contact with the ground. All set level and square and properly spaced! Never forget to utilize blocks that are solid for a shed foundation since within no time, those wall blocks that are hollow-core are likely to crack and disintegrate under the weight of it if not! Your skids should be made from pressure-treated lumber that’s specifically intended for ground-contact use.

Huge chicken sheds over two hundred square feet definitely need permanent foundations extending down to frost line. You will be required to extend down when digging to the proper depth, then bury posts that have been pressure-treated or pour concrete piers. It will be also necessary to check with department of building for code specifics and the depth of frost-line in your area.

Don’t take my word for it though, like I say I am no building expert, but definately bear it in mind before spending any serious money on purchasing your list of materials.

framing-coop-floor
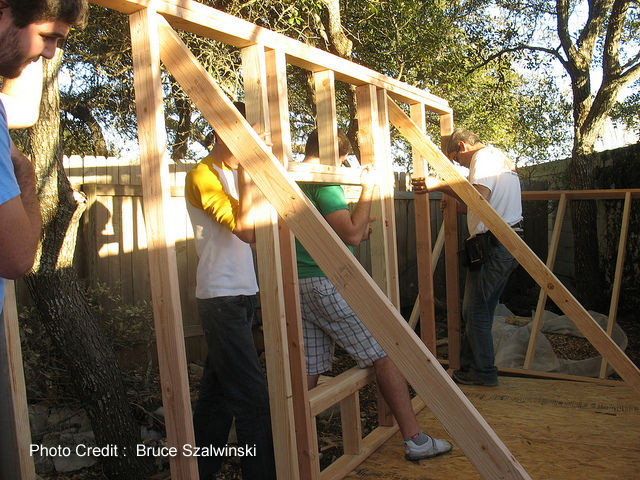
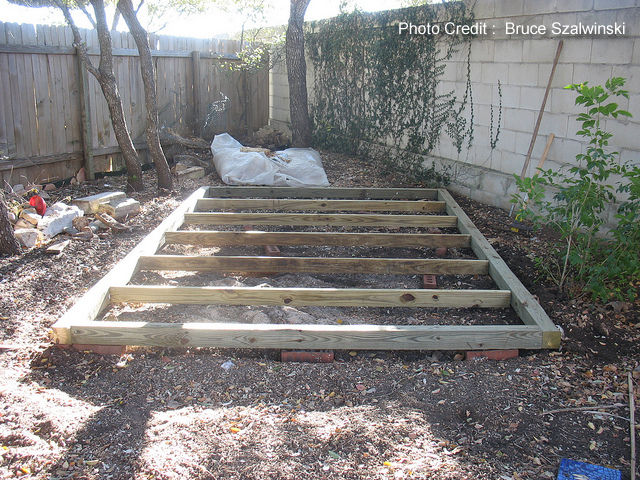
4. Build a Floor that will last:

Construction lumber that is not treated may be cheaper but for a good strong base for your coop you  will need to use lumber for your floor framing that has been pressure-treated. This includes;

  • Floor joists,
  • Mudsill, and
  • Perimeter band joists.

Floorboards will be perfect when three to four-inch thick exterior-grade plywood is utilized, but if you looking for even more strength and support, install plywood that is three or four-inch tongue-and-groove  instead. Its sheets edges will lock together, but because of its benefits, it’s costly! Plywood that is pressure-treated (and which is more resistant to weather compared to the plywood that is exterior-grade) should be utilized if the site contains excessive moisture.

After viewing the above conditions and deciding what plywood to utilize, secure it using two-inch long decking screws that are galvanized to be specific and so should be rust-resistant and secure better than nails.

As cost is important to most people, and bearing in mind it is unlikely your chickens could ever pay you back with eggs you may prefer to opt for a chicken coop that is quicker and easier to build using lighter and/or reclaimed materials. Especially if it is your first time keeping chickens. If you find you love having them, you will probably want to upgrade whatever your have built as their first house within a couple of years (don’t believe me? you’ll see 🙂 and if you find keeping chickens is not in your long-term future for whatever reason you might be glad you didn’t spend $1000s on your first coop.

5. Good Air-circulation should be promoted:

Ventilation is vital for your hens. Imagine how you would feel shut in a small wooden box with your family. All their collective body heat and the moisture in their breath can easily cause serious condensation / damp issues in a coop that is not ventilated properly. In the coldest weather it is the moisture in the air that freezes on their combs. When ventilating the coop the main thing is that they are not in any drafts. Bearing in mind that some people will have a whole wall of the coop left to open air, you can be fairly sure that you are unlikely to give them too much ventilation, but not enough, is quite common.

putting-up-wall
It helps to have help…

6. Give it Space for more benefits:

Building your chicken coop too close to fences, trees, or even shrubs with an aim to economize space, will only prevent sunlight and block wind thus allowing the shed to remain damp. This action will also encourage mold and mildew since they hate direct sunlight. Give it at least open space of three feet all around (more if your local authority says so) and then you will also be helped if you need to paint or repair it, as you’ll have extra clearance space!

7. You don’t necessarily have to do everything yourself, use some help to clear and level the site:

If you happen to be or know an expert carpenter or do it yourselfer then building a chicken coop is overall going to be a fairly simple job as it doesn’t require any special joining skills or anything like that, in many cases a nail gun would be the main tool you would use. If you are not an expert and/or are working alone it would be also reasonable to employ a landscaping contractor, for a short contract of course, to clear thick underbrush, trees and rocks, since some parts when building a backyard coop are simply more trouble than they are worth and may be almost impossible to do by yourself if you are not experienced. Let the excavator level the uneven building space or even dig the potholes. Utilize the assistance of a mason in order to assist in mixing and pouring concrete slabs and footings.